Jump to content United States-English
HP.com Home Products and Services Support and Drivers Solutions How to Buy
» Contact HP
More options
HP.com home
Software Distributor Administration Guide: HP-UX 11i v1, 11i v2, and 11i v3 > Chapter 4 Managing Software Depots

Copying Software Depots

» 

Technical documentation

Complete book in PDF
» Feedback
Content starts here

 » Table of Contents

 » Glossary

 » Index

The swcopy command copies software between depots. Software that is copied into a depot cannot be used directly; it is placed there only to act as a source for installation and other SD-UX operations.

swcopy Features and Limitations

  • swcopy does not perform compatibility checking.

  • swcopy does not run control scripts.

  • swcopy does not perform kernel building or rebooting, although it does perform other pre-install and postinstall checks, such as disk space analysis and requisite selection.

  • When you create or modify a depot with swcopy, SD-UX automatically creates catalog files that describe the depot. These are stored in the IPD. See “Modifying the IPD (swmodify)” for more information.

  • Software dependencies apply to selections made with the swcopy GUI.

Using the swcopy GUI

Overview

This section provides an overview of the swcopy GUI.

The copy process has six steps:

Table 4-3 Copy Process Steps
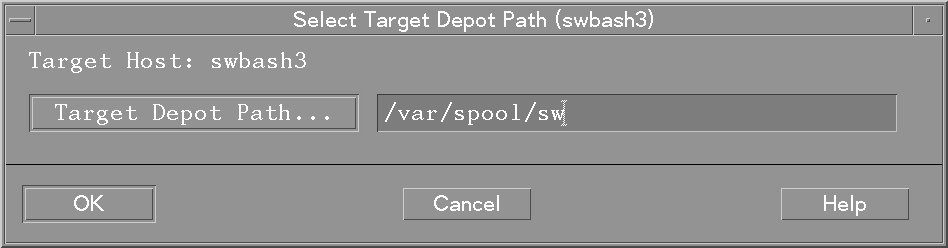
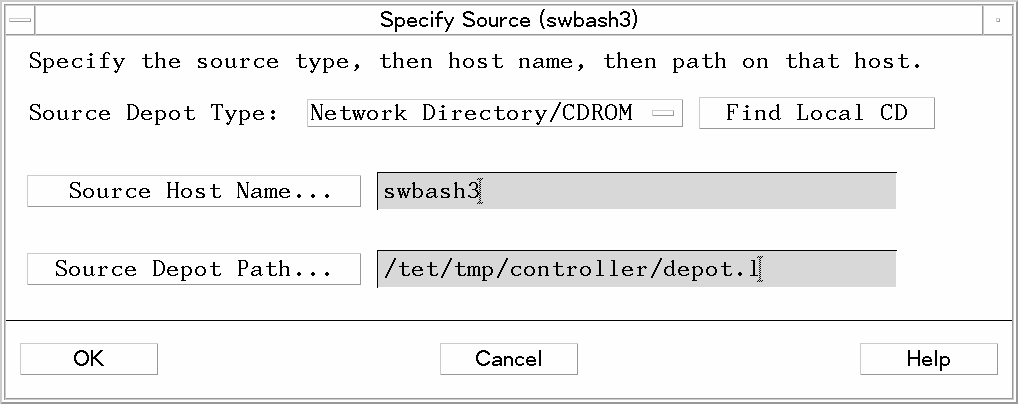
I. Start-Up

Start the swcopy GUI.

II. Specify Target

Provide the location to which you want to copy the software.

III. Specify Source

Provide the location of the software depot from which the software will be copied.

IV. Select SoftwareSelect the software you want to copy.
V. Analysis (Preview)swcopy determines if the copy operation can succeed.
VI. CopyThe actual software copying process.


Step I: Start-Up

To start the GUI or TUI for an copy session, type:

/usr/sbin/swcopy

The GUI is automatically invoked unless you also specify software on the command line. To invoke the GUI and specify software, include the -i option. For example, to use the GUI for a preview (analysis only) session with MyDepot, type:

swcopy -i -p /MyDepot

The Software Selection window appears with the Specify Source dialog and the Select Target Depot Path dialogs superimposed over it.

Step II: Specify Target

In this step, you specify the target to which SD-UX will copy the software.

(This step is skipped if you include the -t target option when you invoke the GUI. See “Using the swcopy Command Line”.)

The Select Target Depot Path dialog displays the default target depot. Since this matches the default source depot path, you must select a new target:

Figure 4-1 Select Target Depot Path Dialog

Select Target Depot Path Dialog
  1. Enter a target path:

    • Type a new target path in the text box.

      or

    • Click the Target Depot Path... button. The Depot Paths dialog appears, listing registered depots on the host.

      1. Click on a depot in the list.

      2. Click OK. The Target Depot Path dialog disappears. The depot you selected is now displayed in the Select Target Depot Path dialog.

  2. Click OK.

The Select Target Depot Path dialog disappears, and the Specify Source dialog is highlighted.

Step III: Specify Source

In this step, you must specify the source depot that contains the software you want to copy. The Specify Source dialog (Figure 4-2: “Specify Source Dialog ”,) automatically lists the local host and default depot path.

(This step is skipped if you include the -s source option when you invoke the GUI. See “Using the swcopy Command Line”.)
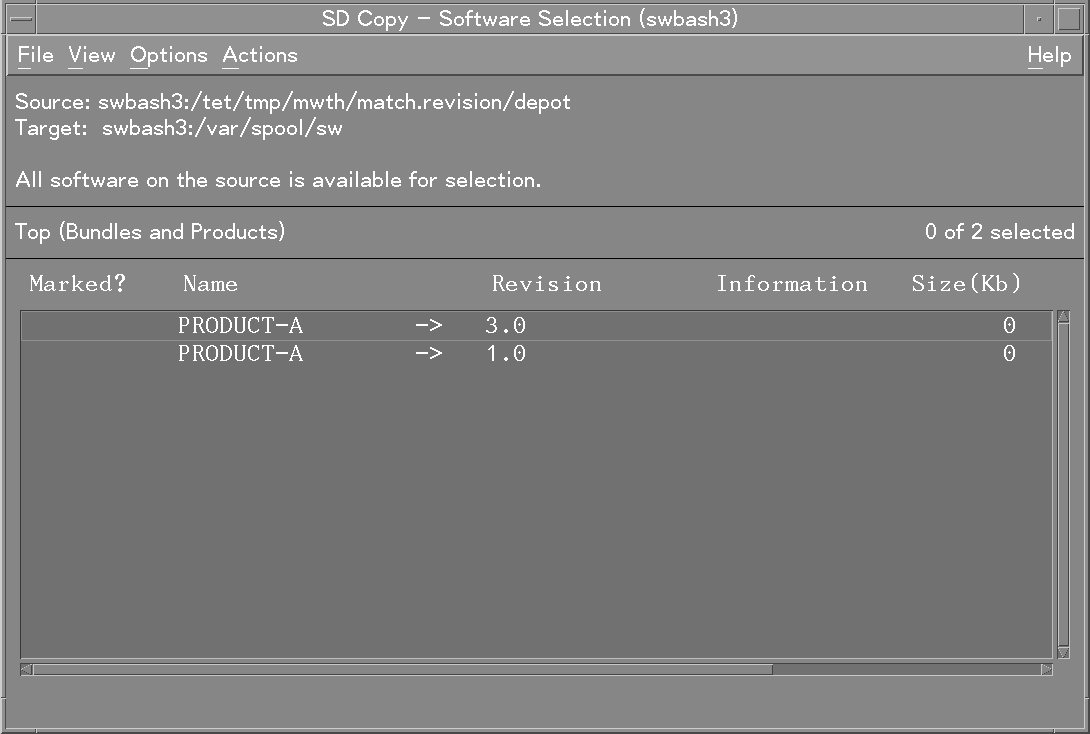
Figure 4-2 Specify Source Dialog

Specify Source Dialog
  1. (Optional) To specify another host system, type a source host name, or:

    1. Click on the Source Host Name button. The system displays a dialog that lists all host system names contained in the defaults.hosts file ($HOME/.sw/defaults.hosts or /var/adm/sw/defaults.hosts).

    2. Choose a host name from the list.

    3. Click OK. The host name appears in the appropriate box in the Specify Source dialog.

  2. (Optional) To specify the path to the depot, type a new path, or:

    1. Click on the Source Depot Path button to display a list of registered depots on the source host.

    2. Highlight one of the depots.

    3. Click OK to make it appear in the Specify Source dialog.

  3. Click OK. The Specify Source dialog closes, and the Software Selection window displays the software contained in the depot you specified.

Step IV: Select Software

In this step, you use the Software Selection window (Figure 4-3: “Software Selection Window ”,) to select the software you want to copy.
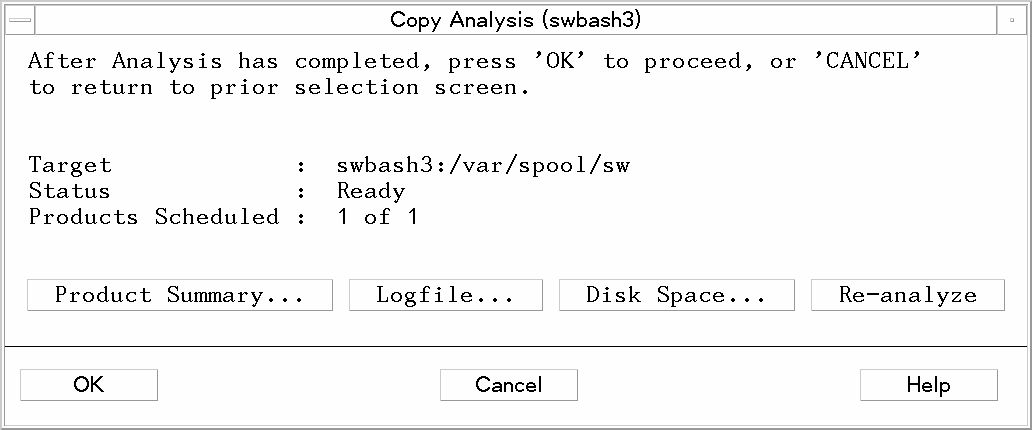
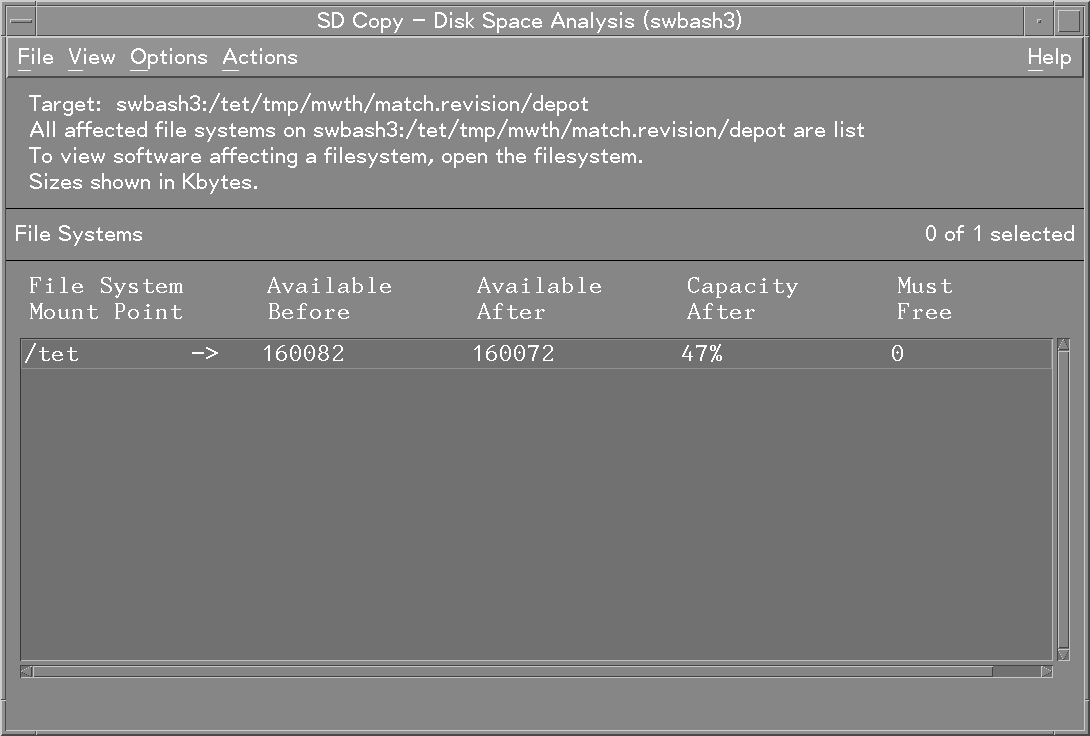
Figure 4-3 Software Selection Window

Software Selection Window
  1. Select software from the object list:

    1. Highlight an item

    2. Select Actions→Mark For Copy

      or

      Right-click to display the pop-up, then select Mark For Copy

    The Marked? flag in the object list changes to Yes to match your selection. (The flag Partial may appear if you select only some component of a software object.)

  2. (Optional) Use additional choices from the Actions menu:

    • Add Software Group displays a list of previously saved software group files or lets you specify a directory. Selecting a file adds the software selections in the file to any selections you have already made in the Software Selection window.

    • Save Software Group lets you save your current list of marked software as a group.

    • Manage Patch Selections lets you select from a list of patches to copy, select filters for patches, and set other patch options.

    • Change Source...cancels your software selections and returns you to the Specify Source dialog.

    • Add New Codeword lets you add a new codeword to unlock protected software. (This option is available only when SD-UX detects that the source contains protected software.)

    • Show Description of Software (available only for a single item highlighted in the object list) displays more information on the selected software.

    • Change Target... returns you to the Select Target Depot Path dialog (“Step II: Specify Target”).

  3. Select Actions→Copy to start the analysis (preview) step. The Analysis dialog appears.

Step V: Analysis (Preview)

In this step, SD-UX analyzes the software you have selected.

The Analysis window displays status information about the analysis process. When the analysis is complete and the host status shows Ready, click OK to start the actual copy (see “Step VI: Copying”). The Analysis dialog is then replaced by the Copy dialog.

If you started a preview session, the copy stops after the analysis. Clicking Cancel returns you to the Software Selection window.

Figure 4-4 Copy Analysis Dialog

Copy Analysis Dialog

The following actions are available:

  • Product Summary gives additional information about the product or bundle and provides a Product Description button that displays information about additional information about dependencies, copyright, vendor, etc.

  • Logfile presents a scrollable view of detailed copy information written to the logfile.

  • Disk Space displays the Disk Space Analysis window (Figure 4-5: “Disk Space Analysis Window”,) which shows:

    • The file system mount point,

    • How much disk space was available before the copy,

    • How much will be available after the copy,

    • What percent of the disk’s capacity will be used.

    • How much space must be freed to complete the operation.

    Menu choices in this window let you:

    • Search the object list.

    • Open items to look at the projected size requirements for specific filesets.

  • Re-analyze repeats the analysis process.

Figure 4-5 Disk Space Analysis Window

Disk Space Analysis Window

When Analysis completes, the status for any host displays as either Ready or Excluded from task. If any of the selected software can be copied onto the host, the status shows Ready. If none of the selected software can be copied onto the host, the status shows Excluded from task.

The following list summarizes the status results. You can find details about most problems by clicking the Logfile button.

Ready

There were no errors or warnings during analysis. The copy may proceed without problems.

Ready with Warnings

Warnings were generated during the analysis. Errors and warnings are logged in the logfile.

Ready with Errors

At least one product selected will be copied. However, one or more products selected are excluded from the task because of analysis errors. Errors and warnings are logged in the logfile.

Communication failure

Contact or communication with the intended target or source has been lost.

Excluded due to errors

Some kind of global error has occurred. For example, the system might not be able to mount the file system.

Disk Space Failure

The copy will exceed the space available on the intended disk storage. For details, click the Disk Space button.

The Products Scheduled column shows the number of products ready for copying out of all products selected. These include:
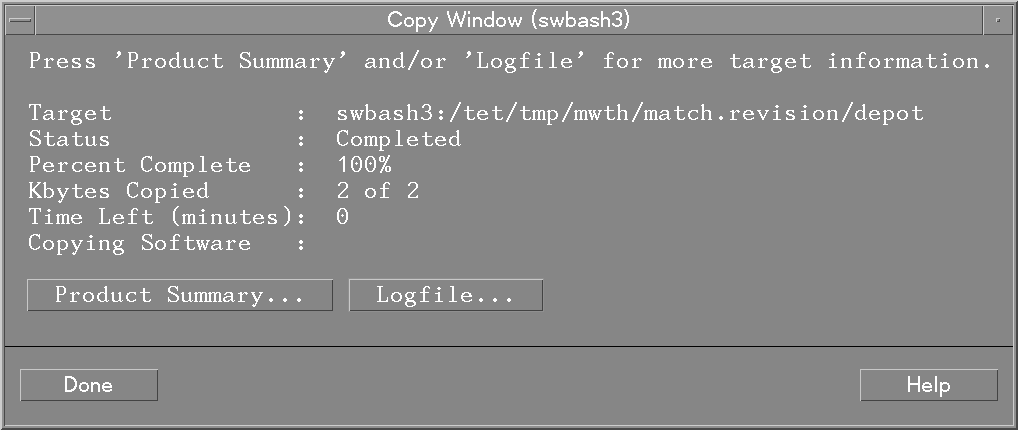
  • Products selected only because of dependencies

  • Partially selected products

  • Other products and bundles that were selected

Step VI: Copying

In this step, SD-UX proceeds with the actual copy.

After you click OK in the Analysis window, SD-UX starts copying and displays the Copy Window (Figure 4-6: “Copy Window”,), which shows status information.

Figure 4-6 Copy Window

Copy Window

These action buttons are available:

  • Done returns you to the Software Selection Window. You can then begin another copy or exit the GUI (File→Exit).

  • Product Summary display copy and product information (name, revision, copy results, copy summary, product description).

  • Logfile displays the logfile.

Using the swcopy Command Line

swcopy Syntax

swcopy [XToolkit_Options] [-i] [-p] [-v] [-C session_file]  [-f software_file]  [-Q date] [-s source] [-S session_file]  [-t target_file][-x option=value] [-X option_file]  [software_selections] [@ target_selections]

Options and Operands

XToolkit_Options

X window options for the GUI. See “XToolkit Options and Changing Display Fonts ”.

-i

Run the GUI program. See “Using the swcopy GUI”.

-p

Preview a copy task from the command line by running it through the Analysis Phase and then exiting.

-v

Turn on verbose output to stdout and display all activity to the screen.

-C session_file

Run the command and save the current option and operand values to a session_file for re-use in another session. See “Session Files”.

-f software_file

Read a list of software selections from a separate file instead of (or in addition to) the command line. See “Software Files”.

-Q date

Schedules a job for the given date when remote operations are enabled. See “Scheduling Jobs from the Command Line” and Chapter 7: “Remote Operations Overview”

-s source

Use the software source specified by source instead of the default, /var/spool/sw. The syntax is: [­host­­:­]­[directory]

host may be a host name, domain name, or internet address (for example, 15.1.48.23). directory is an absolute path.

-S session_file

Run the command based on values saved from a previous session, as defined in session_file. See “Session Files”.

-t target_file

Read a list of target selections from a separate file instead of (or in addition to) the command line. See “Target Files”.

-x option=value

Sets a command option to value and overrides default values or a values in options files. See “Changing Command Options ”.

-X option_file

Read session options and behaviors from option_file. See “Changing Command Options ”.

software_selections

The software objects to be copied. See “Software Selections”.

target_selections

The target of the command. See “Target Selections”.

Changing Command Options

You can change the behavior of this command by specifying additional command-line options when you invoke the command (using the -xoption) or by reading predefined values from a file. The following table shows the defaults and options that apply to swcopy.

Table 4-4 swcopy Command Options and Default Values

  • admin_directory=/var/adm/sw

  • agent_auto_exit=true

  • agent_timeout_minutes=10000

  • allow_split_patches=false

  • autoremove_job=false

  • autoselect_dependencies=true

  • autoselect_minimum_dependencies=false

  • autoselect_patches=true

  • autoselect_reference_bundles=true

  • codeword=

  • compress_files=false

  • compress_index=false

  • controller_source=

  • create_target_path=true

  • customer_id=

  • distribution_source_directory= /var/spool/sw

  • distribution_target_directory= /var/spool/sw

  • enforce_dependencies=true

  • enforce_dsa=true

  • job_title=

  • layout_version=1.0

  • log_msgid=0

  • logdetail=false

  • logfile= /var/adm/sw/swcopy.log

  • loglevel=1

  • max_targets=

  • mount_all_filesystems=true

  • patch_filter=software_specification

  • patch_match_target=false

  • polling_interval=2

  • preview=false

  • recopy=false

  • register_new_depot=true

  • reinstall=false

  • reinstall_files=true

  • reinstall_files_use_cksum=true

  • remove_obsolete_filesets=false

  • retry_rpc=1

  • retry_rpc_interval={0}

  • reuse_short_job_numbers=true

  • rpc_binding_info=​ncacn_ip_tcp:[2121] ncadg_ip_udp:[2121]

  • rpc_binding_info_source=

  • rpc_binding_info_target=

  • rpc_timeout=5

  • run_as_superuser=false

  • select_local=true

  • software=

  • software_view=all_bundles

  • source=

  • source_cdrom=/SD_CDROM

  • source_directory=

  • source_tape=/dev/rmt/0m

  • source_type=directory

  • target_directory=

  • targets=

  • uncompress_files=false

  • use_alternate_source=false

  • verbose=1

  • write_remote_files=true


For More Information

See Appendix A for complete descriptions of each default.

Copy Tasks and Examples

This section provides examples of commands for copying software products. (See also “Additional Depot Management Tasks and Examples”.)

Simple swcopy Examples

To copy all products from the DAT tape at /dev/rmt/0m to the default depot (/var/spool/sw) on the local host:

swcopy -s /dev/rmt/0m \*

To copy a list of software selections (on a local CD-ROM) named in the file mysoft to a depot at the path /depots/mydep/ on the host named hostA and preview the process before actually copying the software:

swcopy -p -f mysoft -s /mnt/cd @ hostA:/depots/mydep/

Using Software Codewords and Customer IDs

The swcopy command may prompt you for codewords if you try to access codeword protected software. You can also enter new codewords from the command line or from the GUI. This process is identical to that used by swinstall. See “Using Software Codewords and Customer IDs ” for more information.

Multiple Software Products in Depots

Software is packaged into products. Depots can store multiple versions of a product.

If a product version already exists in the depot, swcopy will not replace it unless the reinstall option is set to true. If this option is true, then the product is recopied.

If other versions of the product already exist in the depot, swcopy copies in the new version and the others are not changed.

swcopy does not automatically notify you when multiple versions of a product exist. swcopy only notifies you when an exact version exists and will be skipped (or recopied)

Printable version
Privacy statement Using this site means you accept its terms Feedback to webmaster
© 1997, 2000-2003, 2006, 2007, 2008 Hewlett-Packard Development Company, L.P.