How to Perform a Single-Target Installation |
 |
Overview
The tutorial consists of these steps:
Table 7-2 Installation Steps
| Overview of Installation
Steps |
|---|
I.
Start-up | Start the
Job Browser. |
II.
Select Targets | Specify
the targets where you want the software installed. You can use the
default local target or specify another target. |
| III. Select
Source | Provide the location
of the software depot from which the software will be installed with
the Specify Source dialog. |
IV.
Select Software | Use the Software Selection Window to select the software to install. |
| V. Specify
Install Preferences | Use
the Install Preferences dialog box to set preview or scheduling options. |
| VI. Analysis
and Installation | Perform
the actual software installation or preview. |
| VII. Monitor
Results | Monitor job progress
and results using the Job Browser GUI. |
VIII.
Remove Jobs | Delete the
completed jobs using the Job Browser. |
Step I: Start-up
To initiate an install session:
Start the Job Browser
by typing:
sd
From the Job Browser window,
choose
Actions→Create Job→Install Software...
The message “Invoking a
swinstall process” displays at the bottom
of the window, then the Target Selection Window appears.
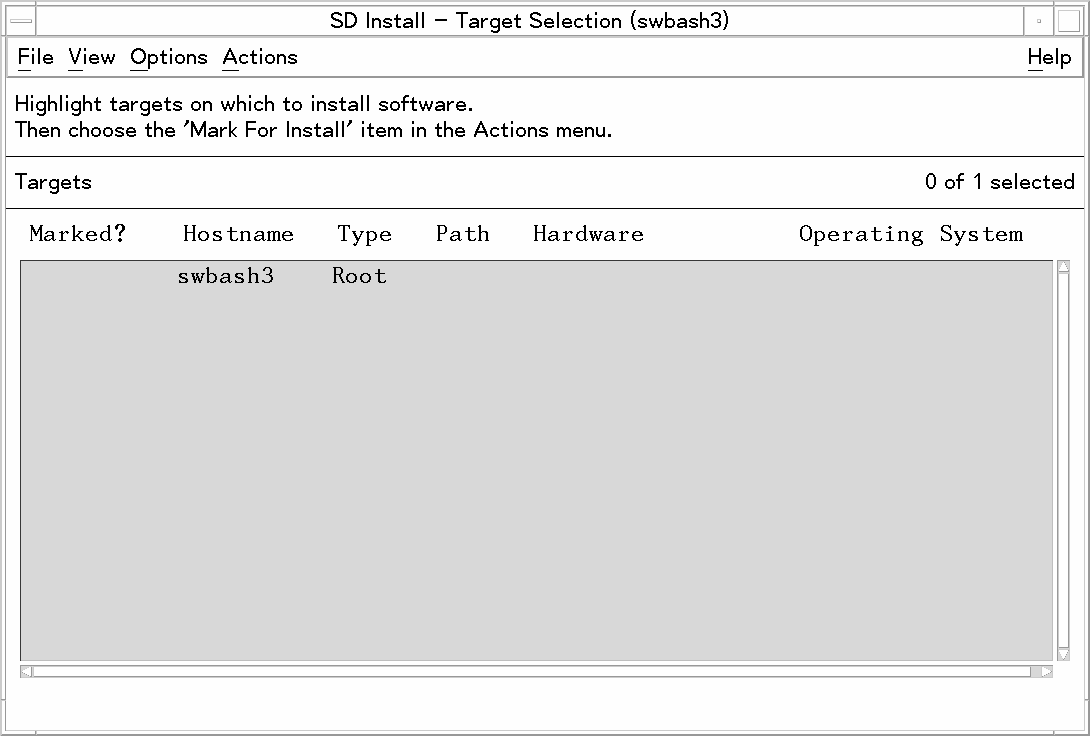
Step II: Select Targets
The Target Selection
Window displays the local, default target. A target is where you want
the installation to go (in the example below, the target is the system swbash3). By default, the current system is listed
(Figure 7-3: “Target Selection Window”,).
Specify the desired target for the installation:
For local default:
Highlight the local target
system with a left mouse click. Then select Actions→Mark for Install (or right-click to display the
pop-up menu and select Mark for Install).
Select Actions→Show Software for Selection...
This displays the Specify Source dialog. If this
is your first time through this tutorial, skip directly to “Step III: Select Source”. After you have
gone through this tutorial once, retry Step I using remote targets.
— or —
For remote targets: choose Actions→Add Targets to install to a different target. This takes you to the Add Targets
dialog (Figure 7-4: “Add Target Dialog (for multiple or non default targets)”,).
Enter the target name
in the Hostname: area (e.g., system_two) and select Add. This
takes you to the Select Target Path dialog.
Use the current root path
(/) by selecting OK. This returns you to the Add Targets dialog.
Select OK in the Add Targets dialog. This updates the Target
Selection Window with your target selection. Yes appears in the Marked column, indicating that the target is marked
for installation.
Choose Actions→Show Software for Selection. The Specify
Source dialog appears.
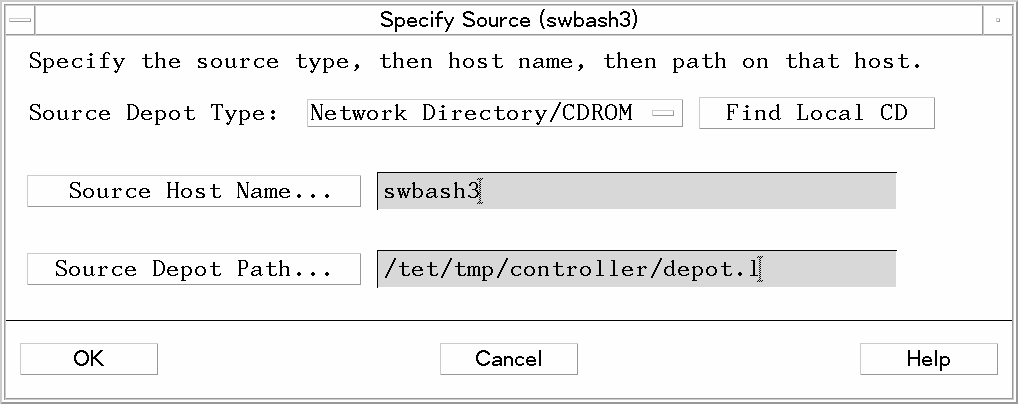
Step III: Select Source
In this step,
the Specify Source dialog lets you select the Source Host Name (the
source system where the depot resides) and Source Depot Path (path
of the depot containing the software).
The Specify Source dialog
should list your controller name or your remote test system name in
the Source Host Name... field and the example depot
that you created (/var/adm/sw/examples/depot) in the Source Depot Path... field.
From this dialog, you can also:
Click on the Source
Host Name... button to display a list of hosts that you can
select from.
Click on the Source
Depot Path... to display a list of registered depots that
you can select from.
Click OK. The Software Selection
Window appears (Figure 7-6: “Software Selection Window”,). This window displays all available software in the depot that
you selected.
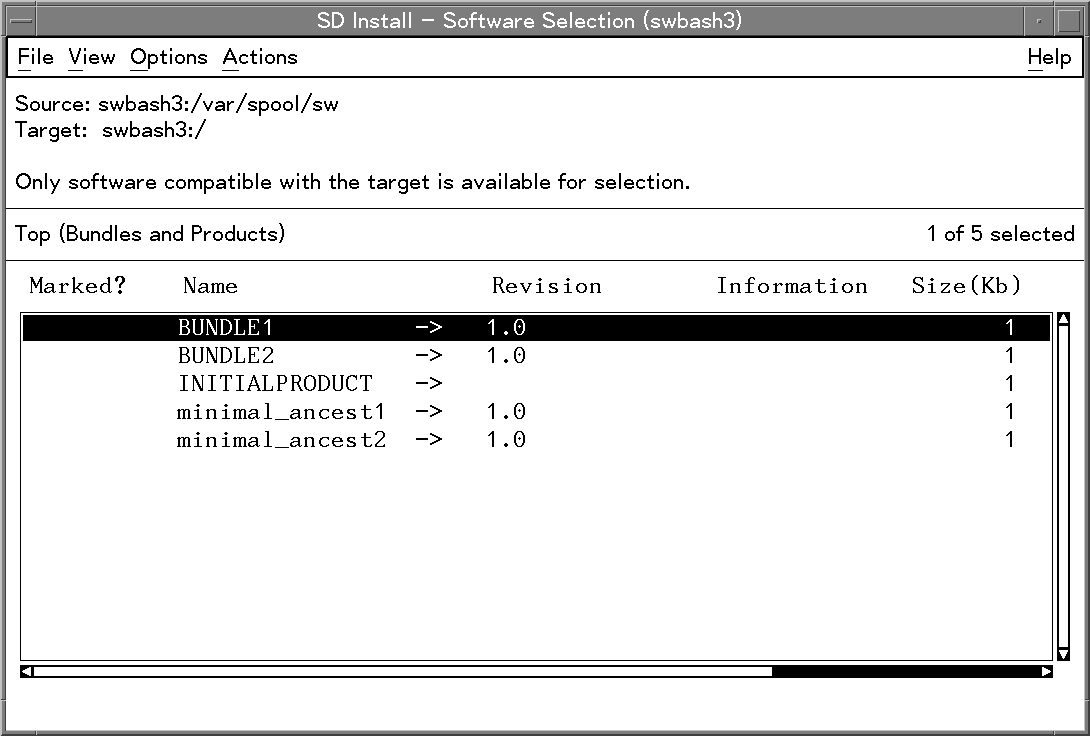
Step IV: Select Software
Use the Software Selection Window to select the
software you want to install.
Highlight SD-DATABASE (i.e., the example software) by clicking
on it with the left mouse button.
Choose Actions→Mark for Install (or right-click to display
the pop-up menu and select Mark for Install).
The Marked? column
is set to Yes for SD-DATABASE.
Table 7-3 Software Selection List
| Software Selection Window Object
List |
|---|
The Software Selection Window
object list is hierarchical: you can open each object in the list
and show objects contained inside. Objects in the list that contain
other objects that can be opened, have an arrow (→) after the name. |
For example: To see the subproducts in the product SD-DATABASE, double click on it. The object list
displays the subproducts. To open a subproduct, double click on the
name. (Or highlight the name and then select Actions→Open Item.) To close an object and return to the previous list,
double click on the first item in the list (..(go up)) or highlight the item and
selecting Actions→Close Level. Note that products are listed together, but subproducts
and filesets may appear in the same list when you open a product.
|
Choose Actions→Install. This displays the Install Preferences
dialog (Figure 7-7: “Install Preferences Dialog”,).
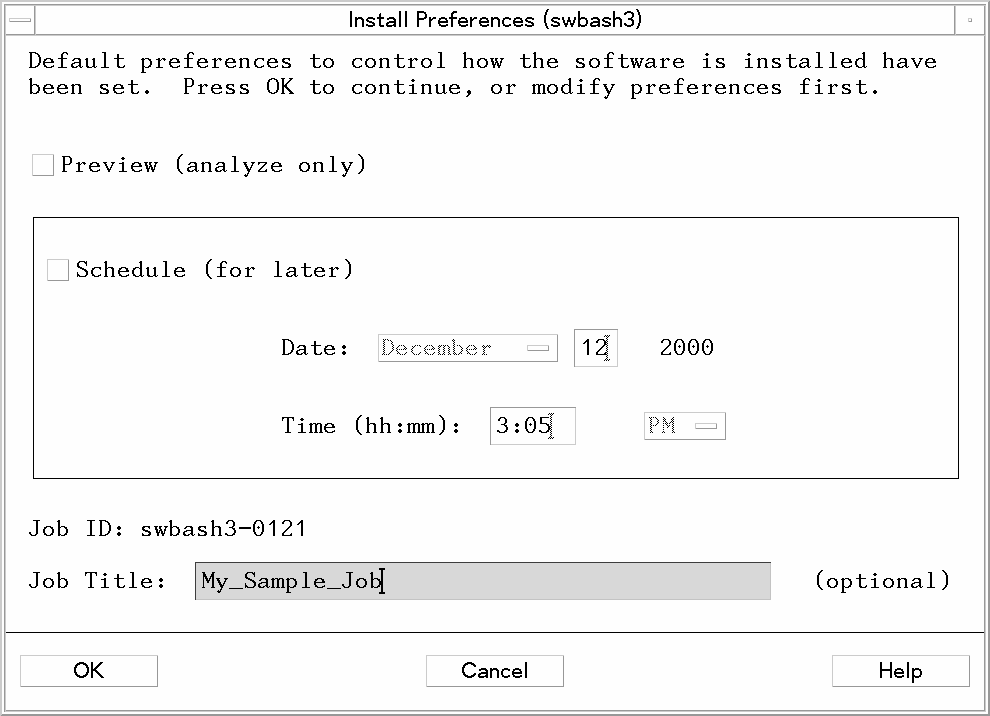
Step V: Specify Install Preferences
The Install Preferences dialog
box gives you the following optional selections: Preview, Schedule, and OK.You can also enter a Job Title.
Select the text area after Job Title and type:
SDTESTJOB
This is the name of your install job.
Select OK to install the software now.
For single-target
installations such as this tutorial, the Install Analysis dialog appears
(Figure 7-8).
If this is your first
pass through the tutorial, proceed to Step V.
(Optional) Previewing
a Job
Select the Preview button. This tells SD to analyze the software without installing
it.
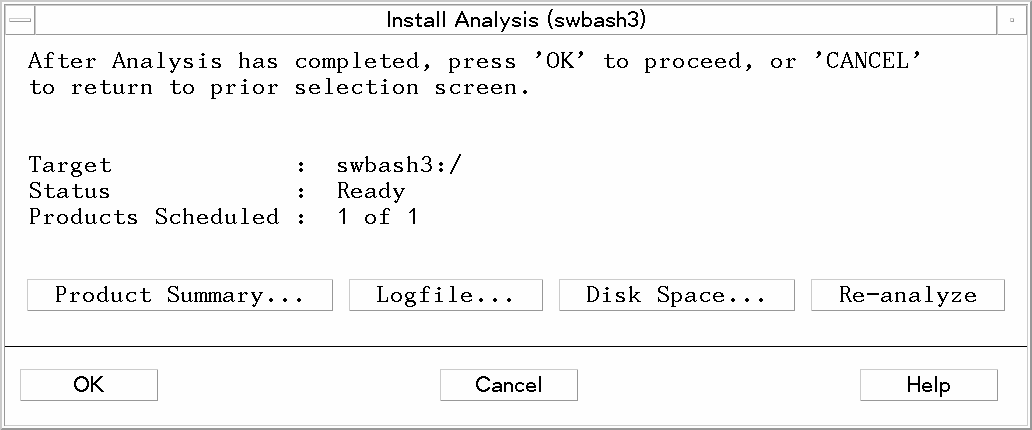
Click OK. The Install Analysis dialog appears. This dialog lets you monitor
the analysis of a single-target job. You can also browse log files
and product summary information.
When the target Status
indicates Ready (analysis is successful),
select OK. This returns you to the Software Selection
Window.
Select Actions→Install. The Install Preferences dialog
appears.
Proceed with the installation
by selecting OK in the Install Preferences dialog.
(If you repeat this tutorial and choose to preview
a job that uses multiple targets, you will find that the Install Analysis
dialog does not appear. You can only preview job progress from the
Job Browser. See “Step VII: Monitor Results ” for more information.)
(Optional) Scheduling
a Job
Select the Schedule button. This activates the fields that let you specify the time
and date you at which you want your job to run. (For example, you
may want to schedule a job at midnight when few users are logged in.)
After you specify the
schedule information, click OK. The system displays
a note indicating that the job has been scheduled.
Click OK in the dialog. The Target Selection Window reappears. Select File→Exit to return to the Job Browser, from which
you can monitor your scheduled job.
Step VI: Analysis and Installation
SD-UX analyzes the target before performing the actual
install, copy, or remove operation. (If you set up a preview job in
Step IV, the install stops after the analysis.)
When the Analysis is complete,
the status for the target you selected should show Ready, indicating no errors or warnings occurred
during analysis. Select OK to proceed with the installation.
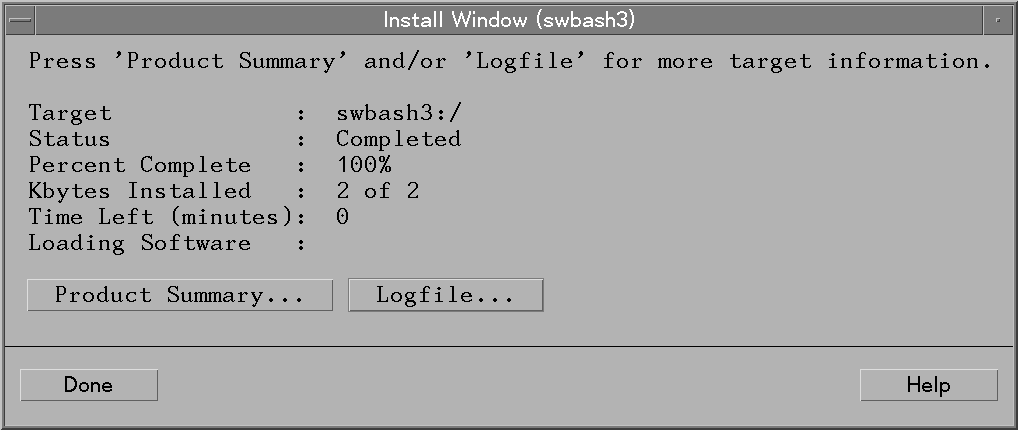
The Install Window dialog (Figure 7-9: “Install Window dialog”,) appears, and the installation
starts automatically. When the status in the dialog changes to Completed, the installation has successfully completed.
Select Done to exit the Install Window dialog. This returns you to the Target
Selection Window.
Select File→
Exit to return to the Job Browser.
(Optional) Select another
target for installation (i.e., Actions→Mark for Install).
Step VII: Monitor Results
When you exit the Target Selection Window,
you return to the Job Browser. The icons in the job list change to
show the status of jobs. Different icons indicate different job status.
(See “Job Browser Icons” for
sample icons.)
Your job, labeled SDTESTJOB, should show with either a check mark or a ruler icon. To verify
status information for SDTESTJOB from
the job list:
Double click SDTESTJOB to invoke the Job Results dialog.
Double click the target
to show the detailed target log.
Click OK to close each dialog after you have viewed it.
— or —
Select the SDTESTJOB icon.
Choose Actions→Show Job Description.... The Job Description
dialog appears. This displays all of the job attributes, the software
and the target(s) involved.
(Optional) Select Show Options... to see what the job option settings.
(Optional) Select Show Results... to see the latest job status.
Step VIII: Remove Jobs
After you have run the tutorial, use the Job Browser
to remove the example jobs:
Click on the SDTESTJOB icon.
Select Actions→Remove Job.... The Remove a Job dialog box
appears.
Select OK.
— or —
Select the job icon and
right click.
Select Actions→Remove Job... from the pop-up menu. The
Remove a Job dialog appears, displaying SDTESTJOB.
Select OK. The SDTESTJOB icon disappears
from the Job Browser and the job is removed from the SD-UX database.