Chapter 25. Menus
- Table of Contents
- 25.1. The MenuShell
- 25.2. MenuBar Widget
- 25.3. Menu Widget
- 25.4. MenuItem Widget
- 25.5. Creating Menus
- 25.6. Manual Menu Example
What users think of as menus are really three parts. First, there is the MenuBar at the top of the window. Second, inside the MenuBar are several Menus. And third, each Menu usually consists of one or more MenuItems.
25.1. The MenuShell
Inheritance Hierarchy
Both the MenuBar widget and the Menu widget are subclasses of MenuShell.
Each MenuShell has the ability to append, prepend, or insert
child widgets:
$menushell->append( $child );
$menushell->prepend( $child );
$menushell->insert( $child, $position );
The MenuShell can be erased from the screen by:
$menushell->deactivate()
A child in the MenuShell can be selected using:
$menushell->select_item( $child );
A child in the MenuShell can be activated using:
$menushell->activate_item( $child );
25.2. MenuBar Widget
Inheritance Hierarchy
Object
+--- Widget
+--- Container
+--- MenuShell
+--- MenuBar
A MenuBar can be created using:
$menubar = new Gtk::MenuBar();
Menu bars are usually placed at the top of the window. Normally, you would create a VBox and add it to the window. You should add the menu bar to the top of that VBox.
The only other function for menu bars (that doesn't come from
MenuShell, that is) sets the shadow type:
$menubar->set_shadow_type( $shadow_type );
Where
$shadow_type
is either
'none',
'in',
'out',
'etched_in', or
'etched_out'.
25.3. Menu Widget
Inheritance Hierarchy
Menus are created using:
$menu = new Gtk::Menu();
If you want to move a child from one position to another, you
can do so using:
$menu->reorder_child( $child, $position );
Where
$child
is the child to move, and
$position
is the new position for the child.
Menus can have a title associated with them. This title is set
using:
$menu->set_title( $title );
The tearoff state of the menu can be set using:
$menu->set_tearoff_state( $tear_off );
Where
$tear_off
is a true or false value that determines whether the menu can
tear off. A menu is normally displayed as a drop down menu that
persists as long as the menu is active, but a tearoff menu is
enclosed in a window which persists until the window is closed.
Finally, if you want the menu to act as a popup menu, you would
call:
$menu->popup( $parent_menu_shell,
Where
$parent_menu_shell and
$parent_menu_item
will be undefined if the menu is not associated with a menu bar.
For
$activate_time
you can usually get away with
$event->{ 'time' }
but if you desire that the menu go away after releasing the
mouse button, you should put in a
0.
The
$button
argument will usually come from
$event->{ 'button' }.
And finally,
\&menu_position_function
is a reference to a user supplied function used to position the
menu. Most people will just use
undef,
which defaults the menu's top-left position to the location of
the mouse click.
@optional_data,
if included, is sent as the argument to
\&menu_position_function.
$parent_menu_item,
$activate_time,
$button,
\&menu_position_function,
@optional_data );
Expect this function to change soon. It is really supposed to
have the
$button
and
$activate_time
arguments switched around, like this:
$menu->popup( $parent_menu_shell,
$parent_menu_item,
$button,
$activate_time,
\&menu_position_function,
@optional_data );
25.4. MenuItem Widget
Inheritance Hierarchy
Object
+--- Widget
+--- Container
+--- Bin
+--- Item
+--- MenuItem
Creating a MenuItem is as simple as calling one the following
functions:
$menuitem = new Gtk::MenuItem();
$menuitem = new Gtk::MenuItem( $label );
You can select, deselect, and activate a MenuItem using:
$menuitem->select();
$menuitem->deselect();
$menuitem->activate();
If you want to make a MenuItem a submenu, you would do so using:
$menuitem->set_submenu( $menu );
Also, you can remove a submenu using:
$menuitem->remove_submenu();
Lastly, if you want the menu right justified on the menubar,
such as help menus often are (on Unix systems, anyway), you can
use the following function before attaching it to the MenuBar:
$menu_item->right_justify();
25.5. Creating Menus
There are two ways to create menus: there's the easy way, and there's the hard way. The "hard" way is to create all the menus using the above calls directly. The easy way is to use the ItemFactory calls. This is much simpler, but there are advantages and disadvantages to each approach.
The Itemfactory is much easier to use, and to add new menus to, although writing a few wrapper functions to create menus using the manual method could go a long way towards usability. With the Itemfactory, it is not possible to add images or the character '/' to the menus.
In the true tradition of teaching, we'll show you the hard way first. The ItemFactory widget is described in its own chapter .
There are three widgets that go into making a menubar and submenus:
-
a menu item, which is what the user wants to select, e.g., "Save"
-
a menu, which acts as a container for the menu items, and
-
a menubar, which is a container for each of the individual menus.
This is slightly complicated by the fact that menu item widgets are used for two different things. They are both the widgets that are packed into the menu, and the widget that is packed into the menubar, which, when selected, activates the menu.
Once a Menu is created; it is never actually shown (with the show() function), it is just a container for the menu items. I hope this will become more clear when you look at the example below.
Once you've created a menu item you have to put it into a
menu. This is done using the
append()
function. In order to capture when the item is selected by the
user, we need to connect to the
'activate'
signal. So, if we wanted to create a standard
File
menu, with the options
Open,
Save, and
Quit,
the code would look something like:
$file_menu = new Gtk::Menu();
# Create the menu items
$open_item = new Gtk::MenuItem( "Open" );
$save_item = new Gtk::MenuItem( "Save" );
$quit_item = new Gtk::MenuItem( "Quit" );
# Add them to the menu
$file_menu->append( $open_item );
$file_menu->append( $save_item );
$file_menu->append( $quit_item );
# Attach the callback functions to the activate signal
$open_item->signal_connect( 'activate', \&file_open );
$save_item->signal_connect( 'activate', \&file_save );
$quit_item->signal_connect( 'activate', \&file_quit );
# We do not need the show the menu, but we do need to show the menu items
$open_item->show();
$save_item->show();
$quit_item->show();
At this point we have our menu. Now we need to create a menubar
and a menu item for the
File
entry, to which we add our menu. The code looks like this:
$menu_bar = new Gtk::MenuBar();
$window->add( $menu_bar );
$menu_bar->show();
$file_item = new Gtk::MenuItem( "File" );
$file_item->show();
Now we need to associate the menu with $file_menu. This is done with the set_submenu() function.
All that is left to do is to add the menu to the menubar, which is accomplished using the append() function.
Here is a summary of the steps needed to create a menu bar with menus attached:
-
Create a new menu using new Gtk::Menu()
-
Use multiple calls to new Gtk::MenuItem() for each item you wish to have on your menu. And use append() to put each of these new items on to the menu.
-
Create a menu item using new Gtk::MenuItem(). This will be the root of the menu, the text appearing here will be on the menubar itself.
-
Use set_submenu() to attach the menu to the root menu item (the one created in the above step).
-
Create a new menubar using new Gtk::MenuBar(). This step only needs to be done once when creating a series of menus on one menu bar.
-
Use append() to put the root menu onto the menubar.
Creating a popup menu is nearly the same. The difference is that the menu is not posted "automatically" by a menubar, but explicitly by calling the popup() function from a button-press event, for example. Take these steps:
-
Create an event handling function and use the event to find out where to pop up the menu.
-
In the event handler, if the event is a mouse button press, treat event as a button event (which it is) and use it as shown in the sample code to pass information to popup().
-
Bind that event handler to a widget with signal_connect().
25.6. Manual Menu Example
That should about do it. Let's take a look at an example to help clarify.
#!/usr/bin/perl -w

use
Gtk
;
use
strict
;

set_locale Gtk;
init Gtk;


my
 $false = 0;

my
 $true = 1;


my
 $window;

my
 $menu;

my
 $menubar;

my
 $root_menu;

my
 $menu_item;

my
 $vbox;

my
 $button;

# create a new window
$window = new Gtk::Window( 'toplevel' );
$window->set_usize( 200, 100 );
$window->set_title( "GTK Menu Test" );
$window->signal_connect( 'delete_event',
sub
 { Gtk->
exit
( 0 ); } );

# Init the menu-widget, and remember -- never show() the menu widget!!
# This is the menu that holds the menu items, the one that will pop up
# when you click on the "Root Menu" in the app
$menu = new Gtk::Menu();

# Next we make a little loop that makes three menu-entries for "test-menu".
# Notice the call to append().  Here we are adding a list of menu items to
# our menu.  Normally, we'd also catch the "clicked" signal on each of the
# menu items and setup a callback for it, but it's omitted here to save
# space.


for

my
 $i ( 0..2 )
{

my
 $buffer;

   # Copy the names into the buffer
   $buffer = "Test-undermenu - $i";

   # Create a new menu-item with a name...
   $menu_item = new Gtk::MenuItem( $buffer );

   # and add it to the menu.
   $menu->append( $menu_item );

   # Do something interesting when the menuitem is selected
   $menu_item->signal_connect( 'activate',
sub
 {
print
( "$buffer\n" ); } );

   # Show the widget
   $menu_item->show();
}

# This is the root menu, and will be the label displayed on the menu bar.
# There won't be a signal handler attached, as it only pops up the rest
# of the menu when pressed.
$root_menu = new Gtk::MenuItem( "Root Menu" );
$root_menu->show();

# Now we specify that we want our newly created "menu" to be the menu
# for the "root menu"
$root_menu->set_submenu( $menu );

# A vbox to put a menu and a button in:
$vbox = new Gtk::VBox( $false, 0 );
$window->add( $vbox );
$vbox->show();

# Create a menu-bar to hold the menus and add it to our main window
$menubar = new Gtk::MenuBar();
$vbox->pack_start( $menubar, $false, $false, 2 );
$menubar->show();

# Create a button to which to attach menu as a popup
$button = new Gtk::Button( "Press Me" );
$button->signal_connect( 'event', \&button_press, $menu );
$vbox->pack_end( $button, $true, $true, 2 );
$button->show();

# And finally we append the menu-item to the menu-bar -- this is the
# "root" menu-item I have been raving about =)
$menubar->append( $root_menu );

# always display the window as the last step so it all splashes on
# the screen at once.
$window->show();

main Gtk;

exit
( 0 );


### Subroutines

# Respond to a button-press by posting a menu passed in as widget.
# Note that the "widget" argument is the menu being posted, NOT
# the button that was pressed.


sub

button_press

{

my
 ( $button, $menu, $event ) = @_;


if
 ( defined( $event->{ 'type' } ) and
	( $event->{ 'type' } eq 'button_press' ) )
   {
      $menu->popup( undef,
		    undef,
		    $event->{'time'},
		    $event->{'button'},
		    undef );

      # Tell calling code that we have handled this event; the buck
      # stops here.

return
 ( $true );
   }

   # Tell calling code that we have not handled this event; pass it on.

return
 ( $false );
}


# END EXAMPLE PROGRAM
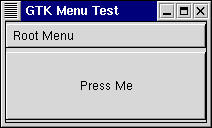
Menu Example Screenshot
You may also set a menu item to be insensitive and, using an accelerator table, bind keys to menu functions.